but the first weekend in october one of my best friends, lacey came up to have the very first craft weekend with me :) she came up on friday and helped with a church event then we had a slumber party at my house. the mr chose to go home to his parents house for the weekend- apparently crafting isn't his thing. friday night we hung out, ordered pizza, & caught up on life.
saturday started with homemade doughnuts & chai tea lattes
the doughnuts are only kind of homemade- i bought biscuit dough in the can and then just punched a hole in the middle & fried it in cooking oil on the stove top
then we ran some errands in the morning. we needed a few more craft supplies and who doesn't like to go shopping when their bestie is in town? then we went home and started the crafting fun!
first up was a crash course in sewing machines for me:
i haven't done any sewing on a machine since like 7th grade home-ec class. but i bought this at the chruch rummage sale last spring (like a year & a half ago!!) for $5 and needed lessons in how to use it again- thanks lacey :)
all of our projects were found on pinterest and can now be found on my things i've made board.
our first 'real' project was these wreaths:

instructions found here
these were super easy to make. first we got our supplies together:
i got the wreath forms at wal*mart for $2.50 each. i'm going to keep my eye on them- i think they'll go down in price soon with christmas decor coming into the stores and fall decor on it's way out.the yarn & felt are also from wal*mart. the felt comes in a 12 pack- i used 3 pieces for my flowers because i wanted 3 colors. if you just want 2 colors you could make enough flowers out of 2 pieces for this project.
you'll want to leave the plastic on the wreath then you just wrap it with the yarn until it's all covered, it doesn't have to be perfect, you just want to cover all of the straw up.
then you make your flowers. you cut the felt into circles, the bigger the circle, the bigger your flower will be. then you cut it into a long strip by cutting a spiral. that doesn't make a whole lot of sense- please go check out the take heart blog- her instructions are much better and she includes picutres :)
after you have your long strip of felt you'll roll it back up from the outside in. ugh- i'm so much better at teaching this in person!
then you'll attache your flowers to your year covered wreath with hot glue.
finished project:
my biggest flower started with a 9x9 circle, the brown one on the left is 6x6, all 3 white ones ares 4x4, and the other 3 are 3x3
next project: glittery coffee mugs. these were inspired by:
project pinterest!! thanks AP
southern blonde jen made this super cute starbucks cup two weeks ago for project pinterest
shut up! how much fun is that??
so lacey & i set out to make our own. this was actually a last minute addition to craft weekend because we found coffee mugs like this at the dollar store while we were out running errands in the am.
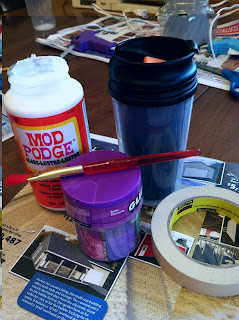
supplies:
coffee mug- dollar store
mod podge, paint brush & masking tape- already had on hand
glitter- wal*mart
this one was super easy. you'll want to unscrew the coffee mug so that the instert comes out but leave the cover on- you don't want glitter all over the inside of your mug! then use the masking tape to block off the top of the mug so that you don't get glitter in the part that screws on.
then you just mod podge sections of it and sprinkle the glitter on. super easy. after the whole thing is glittery and dried apply another coat of mod podge to seal it.
finished project:
i'm not in love with it. i maskd off to much of it so you can see more black at the top then i would like. and the pink glittler is to light, i prefer a more hot pink. the weekend after craft weekend i redid this one. i taped it off higher the second time and used a glitter that is more hot pink.
final final version of the mug:
ps- the mr has been super happy with all of my glitter projects lately
project number 3 was one that i've already done but lacey was in love with it and wanted one of her own: the sweatshirt makeover! inspiration and my first attempt
sorry- i was really bad at taking pictures this weekend, i need to get better about that!
for this all you need is a sweatshirt that is to big & matching thread.
lacey chose a light gray sweatshirt and i got a brown one. we started by taking the arms in and the shoulders up. then we cut up the shirt from bottom to the top a little off center. then we cut button holes and make marks where the buttons should be.
then we stopped. we decided that we could each sew buttons on by ourselves later.
and it was time to go to bed.
project 4: kindle/tablet covers. this is another one that i've made before, but i love it!
inspiration- she gives such great step by step tips! so easy to follow. go check her out.
for this you'll need a book big enough to fit your over your kindle/ipad/table. i have a kindle and lacey has a bigger table- like ipad big. we both found books that worked size wise at the dollar store. and i found 2 other books there that day that i actually want to read, and at $1 each how can you go wrong? you'll also need fabric to cover the book.
finished project:
i love these- they are super easy & totally useful!
project #5: the t shirt dress

isn't that the cutest??
but the link on pinterest takes you to an etsy shop where you can buy these. which is great- i'm glad that someone is making these and that people are buying them. but i wanted one to wear to my college homecoming the second weekend in in oct. not enough turn around time. and i'm such a cheap-o, almost any time i see something in a store, i think 'could i make that for cheaper?' so i got it in my head that i could actually make one of these. i got a new t shirt from my college cuz all of my other ones had writing all over the front and i needed one that just had writing higher up. then i found a gray and white chevron for the bottom half. my college colors are maroon and gold but i didn't want to much of either that's why i settled on the gray.
i wrapped the chevron fabric around my waist- actually closer to my armpits than my waist but you'll want to measure wherever you want your 'skirt' to start. there are a few different versions on her webiste where the skirts start in different places- but i wanted mine up higher.
i wrapped teh fabric around me about 1 1/2 times. i knew that i didn't want it to be super tight fitting but i also didn't want a whole lot of extra fabric. then i pinned my fabric down adding a few ruffles/pleats around it and sewed it down. this explanation makes it sound way easier than it was- it took a lot of trial and error to find what works :)
since i used a maroon shirt, and gray fabric on the bottom i made a bow out of gold fabric that i had on hand. i cut it to be twice as tall as i wanted my belt to be. then i used heat-n-bond to fold both edges in and keep them there. you really could just sew your fabric in a tube and then flip it inside out. then i sewed the belt onto the dress, all the way around except for where you want your bow to be. then i threaded a shoelace thro the belt- inbetween the gold fabric and the dress, right on top of where the chevron fabric met my t shirt. that way i could tie the shoelace a little tighter to cinch me in and then still have the belt and bow lay nicely and not have to adjust them all day.
finished project:
you saw this beauty in action on tuesday
project 6: lacey made a ruffle bag. you've seen these here before (if you haven't check out this post or my facebook album)
here are all of our crafts:
and the aftermath in my craft room:ugh- that's going to take a long time to clean up and re organize :( i need a new organization strategy in there...
love, mrs. k


Wow!! You girls were certainly busy!! Love the glitter mug - I would love to make myself one.
ReplyDeleteThe Kindle cover is pretty neat too.
I used to love crafting - but with 2 kids and my job - I haven't been able to much lately.